Showing posts with label dessert. Show all posts

Sunday, June 8, 2014

Philadelphia Style Cheesecake

I don't know about you, but whenever I make something I think is extremely delicious I state, "This is so good, I should marry myself". A little dramatic/crazy but it doesn't happen all the time. I think this moment happens when I've baked an item enough to know how to do it very well, don't make any errors, and follow the recipe perfectly. Sometimes things get cray in the kitchen but I find that my food comes out better when I'm relaxed, organized and I follow directions fully.
This cheesecake was one of those things. It was so light, sweet, creamy, delicious. Ugh, I had two pieces in one day, which is not good because I'm lactose-intolerant but I couldn't help it! And I almost never eat what I bake. I'll snack and taste, maybe eat a piece but nothing like this. I'm obsessed with cheesecake.

I just finished taking an ice cream, custards, and soft desserts class and let me just state this: after the first day I really disliked the class. However, I came to enjoy making most of the projects in class and became more inspired to make those types of desserts at home. In class we had to make two cheesecakes, one as a group and one individually. This was fun except you had to make your own cookies for the crust. You couldn't bring in graham crackers or vanilla wafers, you had to bake them in class. But they were delicious. And I loved/hated making cheesecake. It's really hard to tell when it is done and if you over bake it, it becomes more cake-like instead of being silky. No bueno.

What I did learn was that all custards are done at 180* and they won't always look done; they will be jiggly. Which is very frustrating if you like baking cakes because you never want to take out a jiggly cake. Mmm and cheesecakes are too delicious. So silky, smooth, and simple. The simplicity is the best part if you aren't exactly comfortable with baking just yet!
This cheesecake recipe is from my reader in the SRJC culinary program. :)


Crust:
1 box vanilla wafers
7 tbsp melted, unsalted butter
4 tbsp granulated sugar

To make crust:

  1. Place cookies in a food processor and pulse until it resembles coarse sand
  2. Add the butter and the sugar and pulse until combined
  3. Press into the bottom of your pan and up the sides.

Cheesecake:
30 oz cream cheese
1 1/4 cup of granulated sugar
5 eggs
1 tbsp vanilla (I used vanilla bean paste)

To make:
  1. Preheat oven to 325* If you have convection, put the fan on low.
  2. Cream the cream cheese and sugar in the bowl of an electric mixer until smooth
  3. Add in the eggs one at a time and be sure to scrape down the sides of the bowl and paddle as you go.
  4. Add vanilla and beat the mixture until smooth. Make sure there are no lumps. Don't over mix. 
  5. Pour the mixture into your pan lined with crust and place in the middle rack of your oven. 
  6. Bake until an instant read thermometer reads 180* let cool at room temperature then put into fridge to chill.
  7. Cheesecake should be cut the day after it is made, not the day it was baked.

When you are ready to cut the cheesecake remove it from the pan and remove the metal bottom. Place on a cardboard circle. Be near a sink or have a large container filled with hot water. Also have a serrated knife, chef knife, and clean towel. It's a lot, but it is super important. 
  1. Wet the serrated knife then wipe with clean towel.
  2. Cut directly across cheesecake. Wet knife and wipe with towel.
  3. Cut the cake into quarters. 
  4. Take the chef knife, wet and wipe with towel
  5. Cut each quarter into 3 pieces. Wetting and wiping the knife between each slice

Important: You MUST wet the knife and wipe clean after each cut because if you don't you'll break up the cheesecake and get nasty, rough edges and crumbs everywhere. Nobody wants that. 

Tips:
There are many important things you should know about baking cheesecake: do not use a spring foam pan if you can help it. They are not as good. Sometimes the bottom or sides become warped and don't attach properly later on. Instead use a pan with a removable bottom like a tart pan. You do not need a water bath. Do not cut the cheesecake on the metal bottom, it will scratch it up and make future desserts not come out the same. It is also handy because you'll never bring a cheesecake to a party or gathering and lose the metal bottom forever! If you can bake it in a convection oven even better. And BAKE IT TO 180, no hotter, no cooler.


"For what it’s worth: it’s never too late to be whoever you want to be. I hope you live a life you’re proud of, and if you find you’re not, I hope you have the strength to start over again."
F. Scott Fitzgerald 


Monday, April 14, 2014

Cakes and Cake Decorating Class

I've been MIA because of school but I'm hoping to get back into the groove of things. I've made countless blogs in the past and tend to give up after 5 posts but I'm determined not to do that with this blog. I took a two week long cake and cake decorating class and it was an amazing experience. There were so many tips and tricks I learned about baking and decorating that I couldn't have learned any other way. My teacher owned and operated an amazing bakery close to my town and now works at an extremely successful bakery. The bakery he owned is one of my favorite places to get cake. Anyways, here are some of the cakes I've made since school started. I plan on making a post about how to make a princess cake, which is my favorite cake on earth. Also I'm going to re-do my strawberry shortcake and perfect it before making a blogpost about it as well.

Princess Cake
Strawberry Shortcake
Making a wedding cake was one of the most exciting/challenging things I've ever done. It took so much time and effort and there were times I just wanted to sit down and cry and times I wanted to drive back to school to work on my cake. I learned a lot from making this cake. I had always feared making a tall multiple tiered wedding cake but I realized this was the perfect opportunity to practice. I still have so much to learn and I'm extremely excited to practice my skills in school. 

Bottom Layer: Chocolate cake
Top Layer: Vanilla cake
My next set of classes being on the 22nd and I'll be taking a tarts and pies class followed by an ice cream and soft desserts class. I plan on posting what I create in class on here and also include any recipes I loved! 


Sunday, February 9, 2014

S'mores Bars

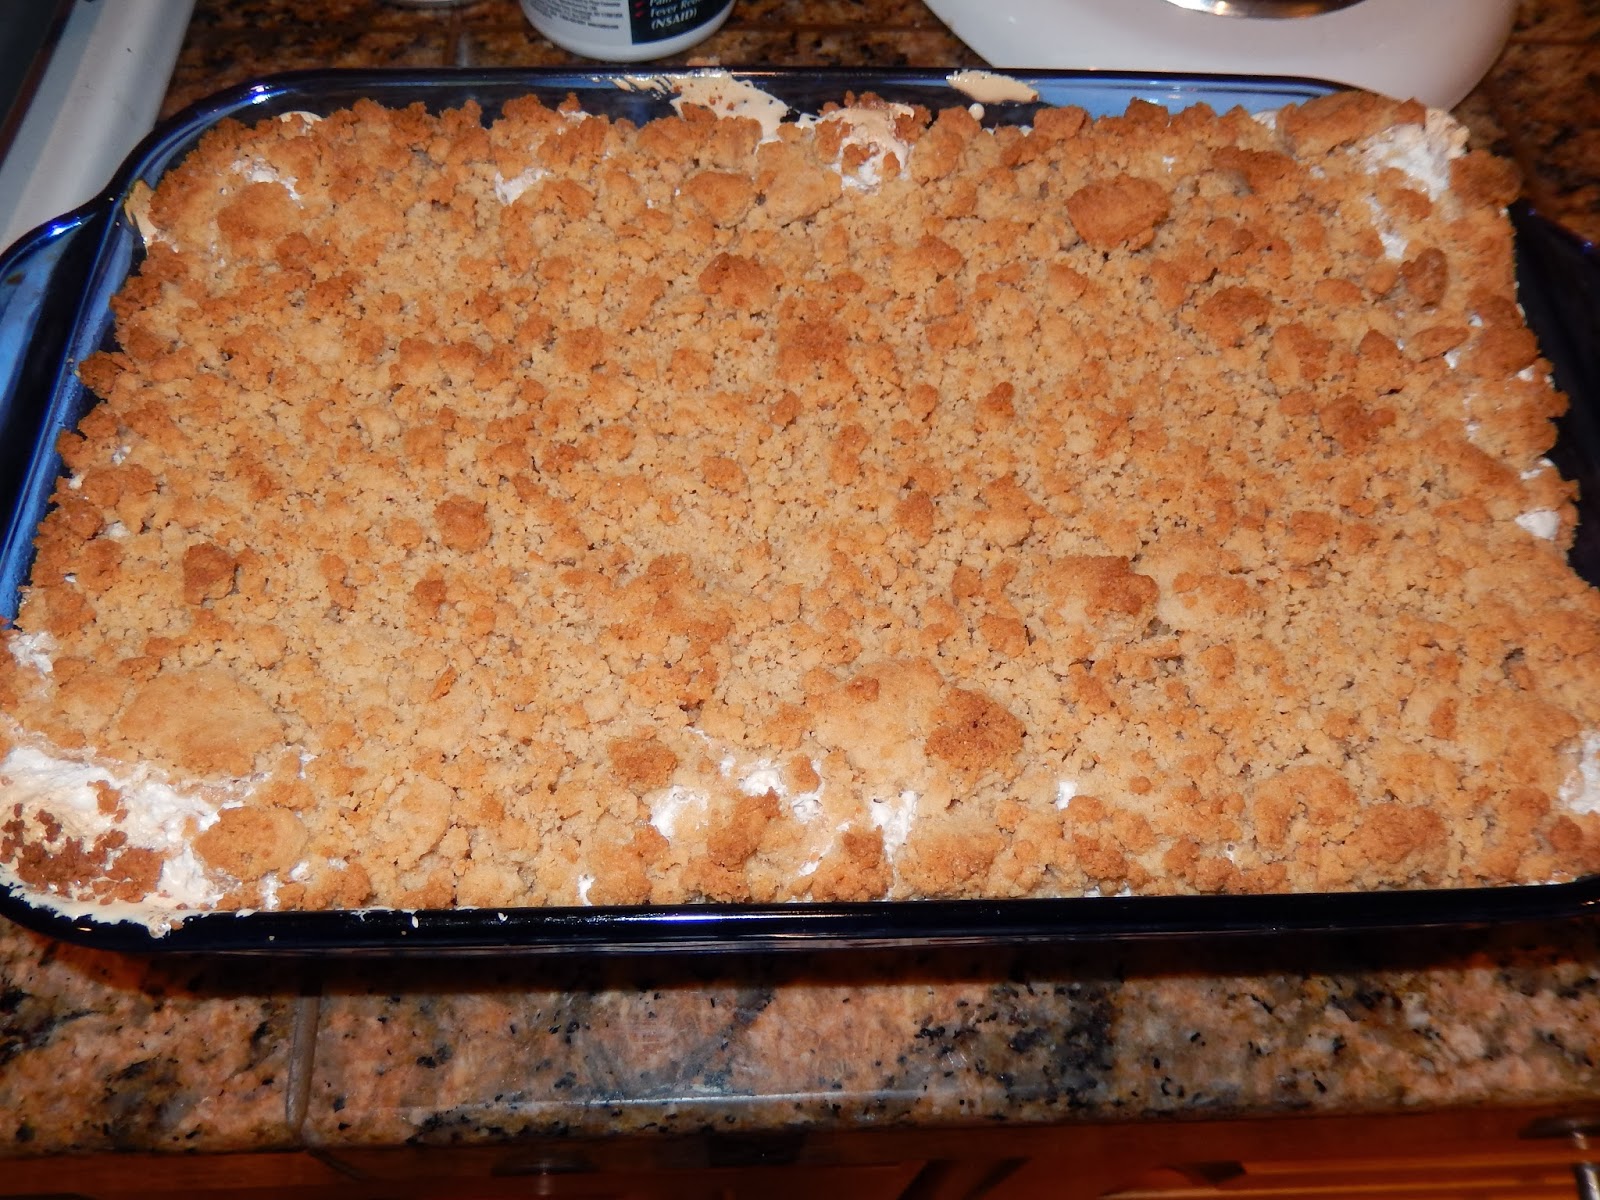
Today was a really good day. I woke up to rain and then went out to breakfast with one of my best friends. We had the most delicious melt in your mouth pancakes and then we went to the mall, Sur La Table and Target before coming home. But a short while after being home I felt sick and I craved comfort food. I wanted soup, stew, mashed potatoes and gravy, milkshakes, anything to make me feel better. I settled on noodle soup but I knew I wanted something sweeter. I thought about driving to the grocery store and buying ice cream or some gummy candy but my mom took my rain boots, I was done spending money, and I sure as hell wasn't going back into the rain. I also remembered I bought the ingredients I needed to make s'more bars. I love this dessert.
I've been making these s'mores bars for a couple of years now and they've always been a favorite of mine. They are super easy to make and they don't take long to prepare and bake. I found the recipe on Crepes of Wrath and I basically follow the entire recipe but I change a few things up. If you wanna find out how to make these delicious s'mores bars then keep on reading!


To make these bars you will need:

-an 11x7 square baking dish
-1 stick of butter
-¼ cup of brown sugar 
-½ cup of sugar
-1 egg
-1 tsp vanilla extract
-1 ⅓ cups of all purpose flour
-8 crushed graham crackers
-1 tsp of baking powder
-¼ tsp of salt
-4 chocolate bars
-1.5 jars of marshmallow fluff (It has to be fluff, not marshmallows, the marshmallows don't turn out well in the oven and the flavor is not the same)


Tip: Before baking it's important to have all of your ingredients pre-measured and set up in your kitchen so you aren't running around, possibly forgetting a step or ingredient, or realizing you don't have everything you need!


  1. Preheat your oven to 350* and butter or Pam your baking dish. 
  2. Crush your graham crackers. I put them in a freezer ziploc and smash them with a hammer or a mallet until they are crumb texture
  3. Cream the butter and sugars in your stand mixer or handheld until light and fluffy.
  4. Add in the egg and vanilla extract and mix.
  5. In a separate bowl combine the flour, crushed graham crackers, salt, and baking powder. 
  6. Slowly add the dry ingredients to the wet ingredients until it crumbs together
  7. Take half of the dough mixture and press it onto the bottom of your baking dish. 
  8. Lay the chocolate bars equally across the dough and lightly press down
  9. Scoop out the one and a half jars of marshmallow fluff onto the chocolate bars and with a flat icing spatula or butter knife, spread across chocolate bars and spread to each end of the dish. You might have to hold the chocolate bars down with your free hand while spreading because the fluff picks things up and is like glue. Seriously if you can tell me how to spread marshmallow fluff and not make it look like a 3 year old did it you are an amazing talented person and I want to know the secret.
  10. Crumble the rest of the dough over the fluff or press into flat, small pieces and place over the fluff. I prefer the crumb method because it's a nice texture. 
  11. Place into the oven and bake for 20 minutes or until the top is golden brown. 
  12. You can even let them fully cool or dig in while the fluff and chocolate bars are still warm and ooze out. Both are extremely delicious. 
I honestly think they are best the next day or a few hours later when the chocolate solidifies again but I never have the patience to not have a piece the moment it's cooled down. They taste delicious with a glass of milk and when you're about to run out the door and you need a snack on the go! :) 

Hello, three years later

Weeks after my last post my world was turned upside down, this will be explained in a future blogpost. Since then I've left jobs, gotten...